Creating PDF files with Multiple Images in Flutter
Introduction
This step-by-step tutorial will guide you on how to create and view a PDF file with multiple images.
It is a relatively easy process once you know the methods, and I will show you how to become natural for creating a pdf file in your projects.
For this tutorial, there are three essential packages needed.
- pdf ⇒ To create PDF documents
- path_provider ⇒ to retrieve the document directory
- syncfusion_flutter_pdfviewer ⇒ to view the created PDF files
Let’s begin by either creating a new project or adding these dependencies to your current project setup.
dependencies:
  flutter:
    sdk: flutter
  path_provider: ^2.0.1
  pdf: ^3.3.0
  syncfusion_flutter_pdfviewer: ^19.1.64-beta
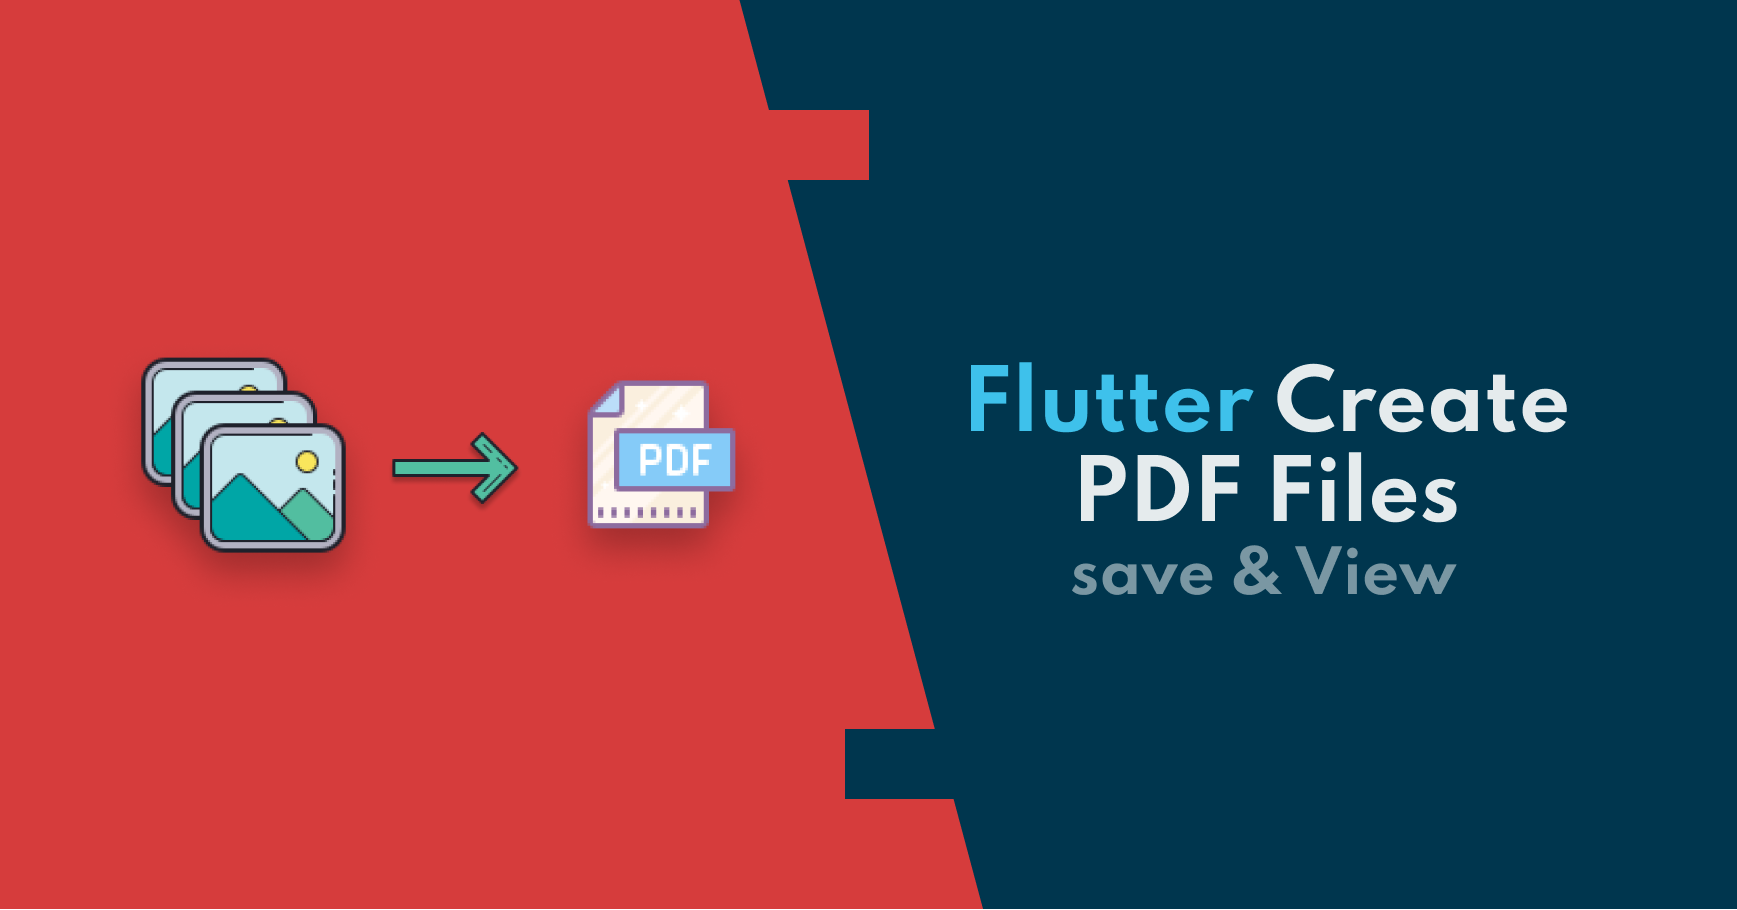
1. Creating a Simple PDF file
Inside the lib folder let’s create a new page called pdf_screen.dart.
And inside the file create a StatefulWidget named PdfScreen.
class PdfScreen extends StatefulWidget {
  @override
  _PdfScreenState createState() => _PdfScreenState();
}

class _PdfScreenState extends State<PdfScreen> {
  String pdfFile = '';

  @override
  Widget build(BuildContext context) {
    return Scaffold(
      body: Center(
        child: Column(
          mainAxisAlignment: MainAxisAlignment.center,
          children: [
            Visibility(
              visible: pdfFile.isNotEmpty,
              child: SfPdfViewer.file(File(pdfFile),
                  canShowScrollHead: false, canShowScrollStatus: false),
            ),
            TextButton(
                onPressed: () {
                },
                child: Text('Create a Pdf')),
          ],
        ),
      ),
    );
  }
}
A simple UI where we have a text button to create a PDF file for us and a Visibility widget to reveal the PDF viewer once the PDF file is created.
For viewing the PDF files, we are going to use the syncfusion_flutter_pdfviewer package’s SfPdfViewer.file widget, and inside this widget we are going to create a file that has the path of the pdf that we have created.
Next, we are going to create 2 methods.
- createPdfFile
- savePdfFile
PDF package has its own widget catalog and in order to call these catalogs, we need to import the pdf widgets as a variable named pw.
import 'package:pdf/widgets.dart' as pw;
To build a PDF layout, we are going to call the widgets by simply calling them pw.<WidgetNme>'.
In order to save a pdf file, we must create a pw.Document(). This special widget will hold the information of the created PDF, thus let’s create a variable inside the _PdfScreenState.
var pdf = pw.Document();
Here in the example, the idea is to create a MultiPage PDF with an a4 format. Based on the number of images we are going to add, the number of pages might be more than one, therefore it makes sense to create a MultiPage widget right now.
Inside the build method of the MultiPage widget, there will be Column with a Header and Divider to divide the content from the header. In the next steps, we are going to add the content under the Divider inside this Column.
createPdfFile() {
    pdf.addPage(pw.MultiPage(
        margin: pw.EdgeInsets.all(10),
        pageFormat: PdfPageFormat.a4,
        build: (pw.Context context) {
          return <pw.Widget>[
            pw.Column(
                crossAxisAlignment: pw.CrossAxisAlignment.center,
                mainAxisSize: pw.MainAxisSize.min,
                children: [
                  pw.Text('Create a Simple PDF',
                      textAlign: pw.TextAlign.center,
                      style: pw.TextStyle(fontSize: 26)),
                  pw.Divider(),
                ]),
          ];
        }));
  }
Afterward, let’s create savePdfFile method.
It is an asynchronous method that awaits the directory of the platform of IOS or Android.
Later, the method creates a file with the name of the ID and the documentPath of the directory. You can name your file however you’d like but for multiple PDF creation, it is better to have unique names for each PDF file created.
Lastly, the method saves the PDF as a file.path and the value is given to the pdfFile variable inside the setState method to later update the UI.
savePdfFile() async {
    Directory documentDirectory = await getApplicationDocumentsDirectory();

    String documentPath = documentDirectory.path;

    String id = DateTime.now().toString();

    File file = File("$documentPath/$id.pdf");

    file.writeAsBytesSync(await pdf.save());
    setState(() {
      pdfFile = file.path;
      pdf = pw.Document();
    });
  }
Important note: It is essential to assign pw.Document() to the pdf variable once again after saving a pdf file. If not done, the pdf will try to create another one on top of the previously created pdf file and that will cause a faulty pdf document to be created.
Bonus: If you want to save your PDF file in bytes you can use the method below.
  List<int> pdfBytes;

    pdfBytes = await file.readAsBytes();

    pdfFile base64Encode(pdfBytes);
Furthermore, create an async onPressed method.
In order to save a file, we need to await createPdfFile method first.
 onPressed: () async {
                  await createPdfFile();
                  savePdfFile();
                },
Ok, now everything is set. You can press the ‘Create a Pdf’ button to see your first simple PDF file.
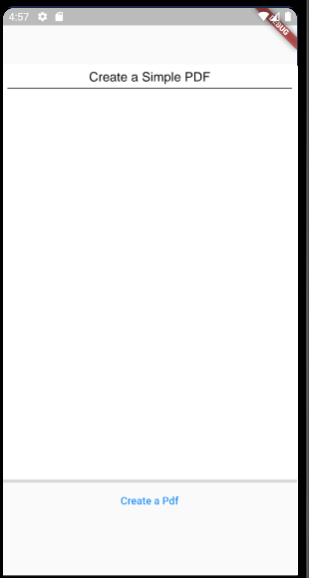
2. Adding an Image
In the pdf package, you can add an Image with pw.MemoryImage. For this reason, we need to convert the images to Memory bytes.
Initially import packages below.
import 'dart:typed_data';
import 'package:flutter/services.dart';
After that, convert createPdfFile into an async method and add these two variables.
- the First variable converts an asset image into bytes
- the Second variable converts the bytes into a list of Uint8List bytes
    final ByteData bytes = await rootBundle.load('assets/images/kitten.png');
    final Uint8List byteList = bytes.buffer.asUint8List();
Then add a pw.Image widget under the Divider.
  pw.Image(
                pw.MemoryImage(
                  byteList,
                ),
                fit: pw.BoxFit.fitHeight)
MemoryImage takes byteList as a positional argument to render the image into the pdf file.
Hot restart the application now and try to create another PDF file to see a file with an image inside it.
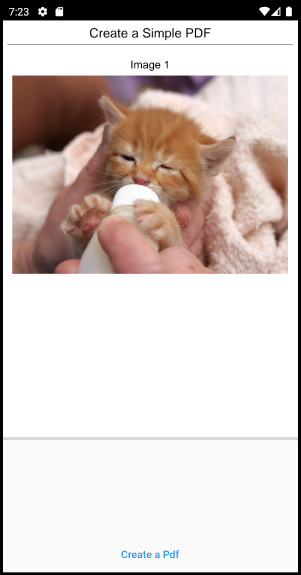
3. Adding Multiple Images
In the final step of the tutorial, we are going to create a pdf build method that can generate a file with given multiple images.
To start with, we need to create a method that converts images to the Uint8List format.
Inside the state widget, create an empty list for storing images as Uint8list.
List<Uint8List> imagesUint8list = [];
Next, let’s refactor the createPdfFile method and extract a new method for getting bytes of images.
 getImageBytes(String assetImage) async {
    final ByteData bytes = await rootBundle.load(assetImage);
    final Uint8List byteList = bytes.buffer.asUint8List();
    imagesUint8list.add(byteList);
  }
Now we will create a list of type pw.Widgets inside createPdfFile method that generates a Column with an image header and image itself.
final List<pw.Widget> pdfImages = imagesUint8list.map((image) {
      return pw.Padding(
          padding: pw.EdgeInsets.symmetric(vertical: 20, horizontal: 10),
          child: pw.Column(
              crossAxisAlignment: pw.CrossAxisAlignment.center,
              mainAxisSize: pw.MainAxisSize.max,
              children: [
                pw.Text(
                    'Image'
                            ' ' +
                        (imagesUint8list
                                    .indexWhere((element) => element == image) +
                                1)
                            .toString(),
                    style: pw.TextStyle(fontSize: 22)),
                pw.SizedBox(height: 10),
                pw.Image(
                    pw.MemoryImage(
                      image,
                    ),
                    height: 400,
                    fit: pw.BoxFit.fitHeight)
              ]));
    }).toList();
Note: It is crucial to give a specific max size to image widgets, otherwise one image might overflow from the page format leading to a failed pdf creation.
In the final step, createPdfFile is going to first create a for loop to convert images into Uint8List. Later it will create a list of images with headers. Lastly, the pdfImages will be displayed inside the main column of the pdf as its children.
 createPdfFile() async {
    //convert each image to Uint8List
    for (String image in assetImages) await getImageBytes(image);
    //create a list of images
    final List<pw.Widget> images = imagesUint8list.map((image) {
      return pw.Padding(
          padding: pw.EdgeInsets.symmetric(vertical: 20, horizontal: 10),
          child: pw.Column(
              crossAxisAlignment: pw.CrossAxisAlignment.center,
              mainAxisSize: pw.MainAxisSize.max,
              children: [
                pw.Text(
                    'Image'
                            ' ' +
                        (imagesUint8list
                                    .indexWhere((element) => element == image) +
                                1)
                            .toString(),
                    style: pw.TextStyle(fontSize: 22)),
                pw.SizedBox(height: 10),
                pw.Image(
                    pw.MemoryImage(
                      image,
                    ),
                    height: 400,
                    fit: pw.BoxFit.fitHeight)
              ]));
    }).toList();

    //create PDF
    pdf.addPage(pw.MultiPage(
        margin: pw.EdgeInsets.all(10),
        pageFormat: PdfPageFormat.a4,
        build: (pw.Context context) {
          return <pw.Widget>[
            pw.Column(
                crossAxisAlignment: pw.CrossAxisAlignment.center,
                mainAxisSize: pw.MainAxisSize.min,
                children: [
                  pw.Text('Create a Simple PDF',
                      textAlign: pw.TextAlign.center,
                      style: pw.TextStyle(fontSize: 26)),
                  pw.Divider(),
                ]),
            pw.Column(
                crossAxisAlignment: pw.CrossAxisAlignment.center,
                mainAxisSize: pw.MainAxisSize.max,
                children: pdfImages),
          ];
        }));
  }
One more step is to wrap the visibility widget with SingleChildScrollView and Expanded widgets.
 Expanded(
              child: SingleChildScrollView(
                child: Visibility(
                  visible: pdfFile.isNotEmpty,
                  child: SfPdfViewer.file(File(pdfFile),
                      canShowScrollHead: false, canShowScrollStatus: false),
                ),
              ),
            ),
Now let’s press the button one last time to create a PDF file with multiple images…
That’s it!
Furthermore, I highly recommend checking the widget library of the PDF package in their official API documentation.
You can follow me on Twitter and stay up to date with weekly Flutter tutorials.
Also, here is the github repository for the source code of this project.